
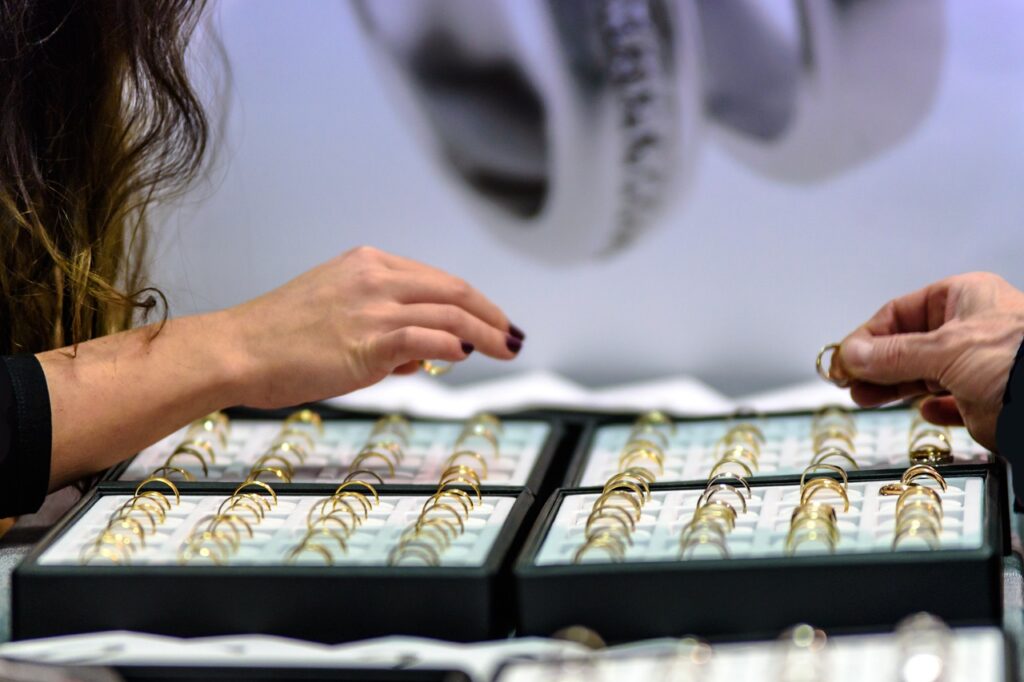
This article serves as a comprehensive guide for anyone interested in creating stunning DIY jewelry at home. Whether you are a novice or an experienced crafter, this guide will cover essential materials, effective techniques, and practical tips to help you unleash your creativity while ensuring quality and style in your designs.
Creating DIY jewelry is not just about crafting beautiful pieces; it’s also an opportunity to express your individuality. By selecting the right materials and tools, you can produce unique items that reflect your personal style.
When embarking on your DIY jewelry journey, it is vital to select the appropriate materials. You can explore a variety of options including:
- Beads: Available in numerous shapes, sizes, and colors.
- Wires: Different gauges and types for various projects.
- Chains: For necklaces, bracelets, and more.
- Findings: Essential components like clasps and hooks.
Having the right tools will significantly enhance your jewelry-making experience. Some must-have tools include:
- Pliers: Round-nose, flat-nose, and chain-nose pliers.
- Wire Cutters: For trimming excess materials.
- Beading Needles: For stringing beads easily.
Mastering fundamental techniques is crucial for creating stunning pieces. Here are some essential skills:
- Stringing Beads: A simple yet effective method for beginners.
- Wire Wrapping: Adds a professional touch to your designs.
- Knotting: Secures beads and creates beautiful patterns.
Design is a key aspect of jewelry making. Consider developing your unique style by:
- Understanding Color Theory: Combine colors effectively.
- Creating a Mood Board: Visualize your ideas and inspirations.
The finishing touches can elevate your jewelry. Techniques include:
- Polishing: Enhance shine and appearance.
- Adding Clasps: Ensure functionality and durability.
If you consider selling your creations, keep in mind:
- Setting the Right Price: Evaluate costs to reflect your craftsmanship.
- Marketing: Use social media to reach a wider audience.
In conclusion, making DIY jewelry at home is a fulfilling endeavor. With the right materials, tools, and techniques, anyone can create beautiful pieces that resonate with their unique style. So gather your supplies, unleash your creativity, and start crafting today!

Choosing the Right Materials
is a fundamental step in the process of creating your own DIY jewelry. The materials you select not only influence the overall aesthetic of your pieces but also determine their durability and functionality. With a wide variety of options available, it’s essential to explore different materials to find what aligns with your personal style and budget.
When it comes to beads, there are countless choices ranging from glass, wood, metal, to gemstones. Each type of bead brings its own unique charm and can drastically change the look of your jewelry. For instance, glass beads can add a pop of color and sparkle, while wooden beads offer a more natural and earthy vibe. Consider creating a color palette that resonates with your personality to guide your selection process.
Next, let’s talk about wires. The wire you choose plays a crucial role in the structure of your jewelry. Options include copper wire, which is malleable and easy to work with, and stainless steel wire, known for its strength and resistance to tarnish. Understanding the gauge of wire is also important; a thicker gauge is more durable, while a thinner gauge is better for delicate designs.
Additionally, having the right tools is essential. Basic tools such as pliers, cutters, and bead boards can make your crafting experience smoother and more enjoyable. Investing in quality tools can save you time and effort, ensuring that you can focus on the creative aspects of your projects.
In summary, selecting the right materials for your DIY jewelry is a crucial step that impacts both the design and functionality of your creations. By exploring various options such as beads, wires, and tools, you can find the perfect combination that suits your style and budget, allowing your creativity to flourish.

Essential Tools for Jewelry Making
When it comes to crafting beautiful jewelry, having the right tools is absolutely crucial. The right tools not only enhance your creative process but also ensure that your projects turn out professionally. Below, we outline the essential tools every jewelry maker should have in their toolkit.
| Tool | Purpose |
|---|---|
| Pliers | Used for bending, shaping, and cutting wire. Different types serve unique functions. |
| Wire Cutters | Essential for trimming excess wire and materials with precision. |
| Beading Needles | Ideal for threading beads onto wire or string, especially for intricate designs. |
| Crimping Tool | Used to secure crimp beads and create strong connections in your jewelry. |
| Ruler or Measuring Tape | For accurate measurements, ensuring your pieces fit perfectly. |
In addition to the tools listed above, consider investing in a jewelry mat to keep your workspace organized and prevent losing small components. A magnifying glass can also be beneficial for detailed work, allowing you to see your designs more clearly.
Ultimately, having a well-equipped workspace with the right tools can make your jewelry-making experience more enjoyable and productive. Whether you are a beginner or an experienced artisan, these tools will help you create stunning pieces that showcase your unique style and craftsmanship.
Types of Pliers
When it comes to jewelry making, having the right tools is essential for achieving precision and quality in your designs. Among these tools, pliers play a pivotal role. Understanding the different types of pliers and their specific functions can greatly enhance your crafting experience. Below, we explore the three most commonly used types of pliers in jewelry making: round-nose pliers, flat-nose pliers, and chain-nose pliers.
| Type of Pliers | Primary Uses |
|---|---|
| Round-Nose Pliers | Ideal for creating loops and curves in wire, allowing for intricate designs. |
| Flat-Nose Pliers | Perfect for bending, holding, and flattening wire. They offer a strong grip for manipulation. |
| Chain-Nose Pliers | Best for gripping and manipulating small components, especially in tight spaces. |
Round-nose pliers are particularly favored for their ability to create smooth, rounded loops, which are essential for connecting different elements of your jewelry. To use them, simply place the wire between the two rounded tips and rotate to form a loop.
Flat-nose pliers, on the other hand, are designed with flat jaws that provide a secure hold. They are excellent for bending wires at precise angles and can also be used to flatten the ends of wires for a polished finish.
Lastly, chain-nose pliers feature tapered tips that allow for precision work in confined areas. They are ideal for closing jump rings and working with delicate components, ensuring your pieces are securely assembled.
In conclusion, selecting the right type of pliers is crucial for effective jewelry making. By understanding the specific uses of round-nose, flat-nose, and chain-nose pliers, you can enhance your crafting skills and create stunning jewelry pieces with ease.
Round-Nose Pliers
are an essential tool in the world of jewelry making, particularly when it comes to shaping wire into beautiful loops and curves. Their unique design features two rounded jaws that allow for precise bending and crafting of wire, making them indispensable for both beginners and experienced jewelers alike.
These pliers are particularly important because they enable the creation of consistent and uniform shapes, which is crucial for achieving a professional look in your jewelry designs. Whether you are creating simple earring hooks or intricate wire-wrapped pendants, round-nose pliers provide the control and accuracy needed to produce high-quality pieces.
To use round-nose pliers effectively, follow these simple steps:
- Select the right gauge of wire: Thicker wires require more strength, while finer wires allow for delicate designs.
- Position the wire: Place the wire between the jaws of the pliers, ensuring it is secure but not overly tight.
- Bend the wire: Gently squeeze the handles of the pliers together and rotate them to create a loop. Adjust the angle as needed to achieve the desired curvature.
- Repeat as necessary: For multiple loops, simply reposition the wire and repeat the bending process.
In addition to creating loops, round-nose pliers can also be used for other techniques, such as making spiral designs or adding decorative elements to your jewelry. Their versatility makes them a must-have in any jewelry-making toolkit.
In conclusion, mastering the use of round-nose pliers can significantly enhance your jewelry-making skills. By incorporating these tools into your projects, you can create stunning, professional-looking pieces that showcase your creativity and craftsmanship.
Flat-Nose Pliers
Flat-nose pliers are an essential tool in the jewelry-making process, renowned for their versatility and ease of use. Their wide, flat jaws allow for excellent grip and control, making them ideal for bending, shaping, and holding wire securely. Here are some techniques to maximize their functionality in your jewelry-making projects:
- Bending Wire: Use flat-nose pliers to create sharp bends in wire. Position the wire between the jaws and squeeze gently to achieve the desired angle. This technique is particularly useful for creating components like hooks or clasps.
- Holding Components: When assembling your jewelry, flat-nose pliers can hold small components in place while you work. This stability allows for more precise placement and reduces the risk of misalignment.
- Flattening Wire: If you need to flatten a piece of wire for a more polished look, simply place the wire between the jaws and squeeze firmly. This technique can create a unique texture that enhances your design.
- Creating Loops: While round-nose pliers are typically used for making loops, flat-nose pliers can also assist in securing the wire ends after looping. This ensures that your design remains intact and professional-looking.
- Working with Jump Rings: Flat-nose pliers are perfect for opening and closing jump rings. Use one plier to hold the ring steady while using the other to twist it open or closed, ensuring a secure connection in your jewelry pieces.
In summary, flat-nose pliers are invaluable for anyone looking to enhance their jewelry-making skills. By mastering these techniques, you can improve the quality and precision of your creations, allowing your unique style to shine through in every piece. Whether you are a beginner or an experienced jeweler, incorporating flat-nose pliers into your toolkit will undoubtedly elevate your crafting experience.
Wire Cutters
Wire cutters are essential tools in the realm of DIY jewelry making. They play a crucial role in ensuring that your projects are not only aesthetically pleasing but also structurally sound. Understanding the various types of wire cutters available can help you make an informed decision that aligns with your specific needs.
Types of Wire Cutters
- Flush Cutters: These are designed to provide a clean cut, leaving a flat edge on the wire. They are ideal for detailed work where precision is key.
- Diagonal Cutters: Also known as wire snips, these are versatile tools that can cut through thicker wires. They are great for general use in jewelry making.
- End Cutters: These cutters are specifically designed for cutting wire at the end, making them perfect for trimming excess length after you have finished your piece.
How to Choose the Right Wire Cutter
When selecting a wire cutter, consider the following factors:
- Wire Gauge: Ensure that the cutter you choose is suitable for the gauge of wire you plan to work with.
- Comfort and Grip: Look for ergonomic designs that provide a comfortable grip, especially if you will be using them for extended periods.
- Quality Material: Opt for cutters made from high-quality steel to ensure durability and longevity.
In conclusion, investing in the right wire cutter can significantly enhance your jewelry-making experience. Choosing the correct type not only improves your efficiency but also contributes to the overall quality of your finished pieces. Equip yourself with the right tools, and you’ll find that your creativity can flourish.


Basic Jewelry Making Techniques
Mastering fundamental techniques is essential for anyone looking to create stunning jewelry pieces. In this section, we will delve into some of the most important skills that every jewelry maker should know, including stringing, wire wrapping, and knotting.
Jewelry making can be a rewarding and creative hobby, but it all starts with understanding the basics. Stringing beads is one of the simplest yet most versatile techniques. It allows you to create beautiful necklaces, bracelets, and even earrings with minimal tools. To begin, gather your chosen beads, a durable stringing material like nylon or wire, and a clasp. Start by measuring the desired length of your piece, then thread the beads onto the string, ensuring they are arranged in a visually pleasing pattern. Once complete, secure the ends with a clasp to finish your piece.
Wire wrapping is another fundamental technique that adds a professional touch to your creations. This method involves using wire to create loops and secure beads or other components. To get started, you will need wire, pliers, and beads. Cut a length of wire and thread a bead onto it. Use round-nose pliers to create a loop at one end, then wrap the wire around the bead several times for security. This technique not only holds the bead in place but also adds an aesthetic appeal to your jewelry.
Lastly, knotting is a crucial technique, especially for stringing materials like silk thread. Knotting helps prevent beads from sliding and adds a decorative element to your pieces. To knot, simply create a knot between each bead as you string them. This technique is particularly effective for pearl necklaces, providing both security and elegance.
In conclusion, mastering these basic jewelry making techniques—stringing, wire wrapping, and knotting—is vital for creating beautiful and durable jewelry pieces. As you practice and refine these skills, you will be well on your way to developing your unique style and crafting stunning designs.
Stringing Beads
is a delightful and accessible technique for creating beautiful jewelry, making it an ideal starting point for beginners. This method involves threading beads onto a string or wire, allowing you to design stunning necklaces, bracelets, and more with ease. Below, we will explore the step-by-step process for stringing beads, along with tips to enhance your designs and ensure a professional finish.
- Gather Your Materials: Start by collecting your beads, stringing material (like nylon thread or beading wire), and essential tools such as scissors and a ruler.
- Plan Your Design: Before you begin, lay out your beads in the desired order on a flat surface. This will help you visualize the final piece and make adjustments as needed.
- Cut Your String: Measure and cut a piece of string or wire that is at least 6 inches longer than the desired length of your finished piece. This extra length will allow for tying knots and attaching clasps.
- String the Beads: Begin threading the beads onto your string or wire, following your planned design. Ensure that each bead slides smoothly and is evenly spaced.
- Secure the Ends: Once all beads are strung, tie a secure knot at each end to prevent the beads from slipping off. If using wire, consider crimping beads to secure the ends.
- Add Clasps: Attach a clasp to one end of your jewelry piece. This can be a simple lobster clasp or a decorative toggle clasp, depending on your style.
- Choose Quality Materials: Invest in high-quality beads and stringing materials to ensure durability and a professional look.
- Experiment with Patterns: Don’t hesitate to mix different shapes, sizes, and colors of beads to create unique designs.
- Practice Makes Perfect: Like any skill, practice will improve your technique. Start with simple designs and gradually challenge yourself with more complex patterns.
By following these steps and tips, you can effortlessly create beautiful bead jewelry that showcases your personal style. Enjoy the process of designing and crafting your unique pieces!
Wire Wrapping Basics
Wire wrapping is an essential technique in jewelry making that not only enhances the aesthetic appeal of your creations but also ensures their durability. This method involves using wire to secure beads and other elements together, creating intricate designs that can elevate your jewelry pieces to a professional level.
To begin with, it is crucial to select the right type of wire. Soft wire, such as copper or aluminum, is ideal for beginners due to its flexibility and ease of manipulation. On the other hand, hard wire is more durable and suitable for advanced projects. When choosing wire, consider the gauge; a lower gauge number indicates thicker wire, which is more robust but less flexible.
Here are some essential tips for successful wire wrapping:
- Practice Your Techniques: Start with simple shapes and gradually progress to more complex designs. Mastering basic loops and wraps will build your confidence.
- Use the Right Tools: Invest in quality tools such as round-nose pliers, flat-nose pliers, and wire cutters. These tools are essential for creating clean and precise wraps.
- Secure Your Beads: When wrapping beads, ensure they are tightly secured to prevent them from slipping. A well-wrapped bead not only looks professional but also ensures longevity.
- Experiment with Designs: Don’t be afraid to try different wrapping techniques. Combining various styles can lead to unique and eye-catching results.
As you gain more experience, you can explore advanced techniques such as bead weaving and incorporating multiple wires into your designs. These methods can add depth and complexity to your jewelry, making it truly one-of-a-kind.
In conclusion, mastering the basics of wire wrapping is a gateway to creating beautiful and professional-looking jewelry pieces. With practice and creativity, you can develop your own style and make stunning accessories that reflect your personality.

Designing Your Jewelry Pieces
Design is an essential component of jewelry making that goes beyond mere aesthetics. It is about expressing your individuality through unique creations that resonate with your personal style. This section delves into the process of developing your distinctive style while ensuring your designs are cohesive and meaningful.
To begin with, it is important to understand your influences. Consider what inspires you—be it nature, art, fashion, or culture. Take note of colors, shapes, and textures that attract you. This awareness will serve as the foundation for your design journey.
Next, you should explore various design styles. Familiarize yourself with different techniques and trends in jewelry making, such as minimalist, bohemian, or vintage styles. This exploration will help you identify what resonates with you and guide your creative process.
Creating a mood board can be a powerful tool in your design development. Collect images, color swatches, and materials that inspire you. This visual representation will not only spark ideas but also help you maintain a cohesive theme throughout your pieces. A mood board acts as a reference point, ensuring that your designs reflect a consistent aesthetic.
As you begin to sketch your ideas, remember to focus on balance and proportion. A well-designed piece should feel harmonious. Pay attention to the size and placement of elements in your jewelry. Experiment with different layouts and combinations until you find a design that feels right.
Lastly, don’t hesitate to seek feedback from friends, family, or fellow jewelry makers. Constructive criticism can provide valuable insights and help refine your designs. Remember, the goal is to create pieces that not only look beautiful but also embody your unique personality.
In conclusion, designing your jewelry is an exciting journey of self-expression. By understanding your influences, exploring styles, creating mood boards, and focusing on balance, you can develop a signature look that truly reflects who you are.
Color Theory in Jewelry Design
Color theory plays a vital role in jewelry design, influencing how different colors interact and affect the overall aesthetic of your pieces. Understanding this theory can significantly enhance your design choices, allowing you to create jewelry that is not only visually appealing but also emotionally resonant.
To effectively combine colors in your jewelry designs, it’s essential to grasp the basics of color theory. Here are some key concepts:
- Color Wheel: The color wheel is a fundamental tool that illustrates the relationships between colors. It consists of primary, secondary, and tertiary colors, helping designers understand which colors complement or contrast with each other.
- Complementary Colors: These are colors that are opposite each other on the color wheel. Using complementary colors in your jewelry can create a striking visual impact, drawing attention to your designs.
- Analogous Colors: These are colors that sit next to each other on the color wheel. They create a harmonious look when used together, making them ideal for more subtle and elegant jewelry pieces.
- Monochromatic Schemes: This approach involves using variations of a single color. It can add depth and sophistication to your jewelry while maintaining a cohesive look.
When designing your pieces, consider the emotional impact of colors. For example, blue can evoke calmness, while red can symbolize passion. By selecting colors that resonate with the message you want to convey, you can create jewelry that speaks to the wearer’s emotions.
Additionally, experimenting with textures and materials can further enhance the color combinations in your designs. Incorporating different finishes, such as matte or glossy, can change how colors are perceived and create unique visual effects.
In conclusion, mastering color theory is essential for any jewelry designer looking to create stunning and meaningful pieces. By understanding how to combine colors effectively, you can elevate your designs and captivate your audience.
Creating a Mood Board
Creating a mood board is an essential step in the jewelry-making process that can significantly enhance your design experience. A mood board serves as a visual collage that encapsulates your ideas, inspirations, and the overall aesthetic you wish to achieve. By gathering images, colors, textures, and other elements, you can create a tangible representation of your vision.
To begin crafting your mood board, start by collecting materials that resonate with your design concept. You can use magazines, fabric swatches, and even digital images from online sources. The goal is to gather a variety of visuals that inspire you and align with the theme of your jewelry project.
- Define Your Theme: Before you start, clarify the theme of your jewelry. Are you aiming for a bohemian look, or perhaps something more elegant? Defining a clear theme will guide your selection process.
- Color Palette: Choose a color scheme that reflects your desired mood. Use color swatches or paint samples to visualize how different shades work together.
- Texture and Materials: Incorporate various textures by adding fabric samples, metal pieces, or even natural elements like stones or leaves. This will help you understand how different materials can complement each other in your designs.
Once you have gathered your materials, arrange them on a board or canvas. Play around with the layout until you find a composition that feels right. This visual representation will not only inspire you during the design process but also keep your creativity flowing.
In summary, creating a mood board is a fantastic way to visualize your jewelry-making ideas. It helps you stay organized and focused, ensuring that your final pieces reflect your unique style and vision. Embrace the process, and let your creativity shine!

Finishing Touches for Your Jewelry
The finishing touches can truly transform your jewelry from simple creations into stunning masterpieces. This section delves into essential techniques that will enhance the overall appearance and functionality of your pieces, ensuring they are not only beautiful but also ready to wear.
Polishing is a crucial step in jewelry making that enhances the shine and overall aesthetic of your pieces. There are various polishing techniques to consider:
- Buffing Wheel: Using a buffing wheel can provide a high-gloss finish. It’s ideal for metals like silver and gold.
- Polishing Cloth: A simple polishing cloth can effectively remove tarnish and restore shine, making it perfect for quick touch-ups.
- Hand Polishing: For intricate designs, hand polishing with a fine abrasive compound allows for greater control and precision.
Clasps and findings are essential components that not only add functionality but also contribute to the overall design of your jewelry. Here’s how to choose and attach them:
- Choosing the Right Clasp: Consider the weight and style of your jewelry. Lobster clasps are secure, while magnetic clasps offer ease of use.
- Attachment Techniques: Use jump rings to connect clasps securely. Ensure they are properly closed to prevent accidental opening.
- Finding the Right Size: Ensure that the clasp size complements the overall design and scale of your jewelry piece.
Before your jewelry is ready to wear or sell, conduct a thorough final inspection. Check for:
- Structural Integrity: Ensure all components are securely attached and that there are no loose parts.
- Surface Flaws: Look for scratches or imperfections that may need additional polishing.
- Comfort: Make sure the piece feels comfortable when worn, adjusting any parts if necessary.
By paying attention to these finishing touches, you can elevate your jewelry creations, making them not only visually appealing but also durable and ready for any occasion.
Polishing Your Jewelry
Polishing is a crucial step in the jewelry-making process that not only enhances the shine but also improves the overall appearance of your creations. By understanding different polishing techniques and materials, you can achieve a professional finish that showcases your craftsmanship.
- Types of Polishing Techniques:
- Manual Polishing: This involves using a polishing cloth or a buffing wheel with polishing compounds to manually buff the surface of the jewelry.
- Machine Polishing: Utilizing a polishing machine can speed up the process and provide a more uniform finish, especially for larger production runs.
- Electrolytic Polishing: This advanced technique uses an electric current to remove a thin layer of material, resulting in a highly reflective surface.
Choosing the Right Polishing Materials
The choice of polishing materials greatly impacts the final outcome of your jewelry. Here are some commonly used materials:
- Polishing Cloths: Soft cloths are ideal for gentle polishing without scratching the surface.
- Polishing Compounds: Various compounds, such as rouge or tripoli, can be used depending on the metal type and desired finish.
- Buffing Wheels: These wheels come in different materials and textures, allowing for versatile polishing options.
Tips for Effective Polishing
- Always clean your jewelry before polishing to remove dirt and oils.
- Test polishing techniques on a small area first to ensure compatibility with your material.
- Use gentle pressure to avoid damaging delicate components.
In conclusion, mastering the art of polishing can significantly elevate the quality of your jewelry. By employing the right techniques and materials, you can achieve a stunning finish that will make your pieces stand out.
Adding Clasps and Findings
When it comes to creating jewelry, clasps and findings are not just functional components; they are essential elements that contribute to the overall durability and aesthetic of your pieces. Choosing the right clasps can enhance the usability of your jewelry while ensuring it remains secure during wear.
Understanding the Types of Clasps
- Lobster Claw Clasps: These are popular for their strength and ease of use. They feature a spring-loaded mechanism that securely closes, making them ideal for necklaces and bracelets.
- Toggle Clasps: Known for their unique design, toggle clasps consist of a bar and a loop. They are easy to fasten and are often used in more decorative pieces.
- Magnetic Clasps: These clasps are perfect for those who struggle with traditional clasps. They use magnets to hold the jewelry together, providing a sleek and modern look.
Choosing the Right Findings
Findings are the components that hold your jewelry together, such as jump rings, headpins, and crimp beads. Selecting high-quality findings is crucial for ensuring the longevity of your creations. Here are some tips:
- Material Matters: Opt for findings made of durable materials like stainless steel or sterling silver, which resist tarnishing and wear.
- Size and Compatibility: Ensure that the size of the findings matches the scale of your jewelry design. For example, larger beads may require sturdier jump rings.
How to Attach Clasps and Findings
Attaching clasps and findings is a straightforward process:
1. Use pliers to open jump rings carefully.2. Thread the clasp onto the jump ring.3. Attach the jump ring to the end of your jewelry piece.4. Close the jump ring securely with pliers.
By following these steps and selecting the appropriate clasps and findings, you can ensure that your jewelry not only looks beautiful but also stands the test of time. This attention to detail will enhance the overall quality of your DIY creations.

Tips for Selling Your DIY Jewelry
If you are contemplating selling your handmade jewelry, understanding how to effectively market and price your creations is crucial. This section offers essential insights to help you attract potential buyers and make your selling experience successful.
Understanding Your Target Audience
Before you start selling, it’s important to identify your target audience. Consider factors such as age, style preferences, and purchasing habits. Knowing who your customers are will help you tailor your marketing strategies and product offerings.
Setting the Right Price
Pricing your jewelry correctly is vital. To determine a suitable price, consider the following:
- Material Costs: Calculate the total cost of materials used in each piece.
- Time Investment: Factor in the time spent creating each item, assigning an hourly wage to your labor.
- Market Research: Analyze similar products in the market to ensure your prices are competitive.
Effective Marketing Strategies
Utilizing various marketing strategies can significantly enhance your visibility:
- Social Media: Platforms like Instagram and Pinterest are ideal for showcasing visual content. Regularly post high-quality images of your jewelry and engage with your audience.
- Online Marketplaces: Consider selling on platforms like Etsy or eBay, which cater specifically to handmade goods.
- Local Craft Fairs: Participate in community events to reach local customers and gain direct feedback.
Showcasing Your Creations
Presentation matters. Invest time in creating an appealing display for your jewelry, whether online or at physical events. Use good lighting, attractive backgrounds, and clear descriptions to highlight the unique features of each piece.
Building a Brand
Establishing a recognizable brand can help you stand out in a crowded market. Develop a consistent style, logo, and messaging that reflects your artistic vision. This will help customers connect with your work on a personal level.
Conclusion
By understanding your audience, setting competitive prices, and implementing effective marketing strategies, you can successfully sell your DIY jewelry. Remember, the key is to remain authentic and passionate about your creations, as this will resonate with potential buyers.
Setting the Right Price
Pricing your jewelry can be a complex task that requires careful consideration of various factors. To effectively set prices that reflect the true value of your craftsmanship, it’s essential to evaluate your costs thoroughly and understand the market landscape.
Understanding Your Costs
Before you can determine a selling price, you need to calculate the total cost of creating your jewelry. This includes:
- Materials: Evaluate the cost of all components, including beads, wires, and any other materials used.
- Labor: Consider the time spent on each piece. Assign a reasonable hourly wage to your craftsmanship.
- Overhead: Factor in expenses such as tools, workspace, and utilities.
Researching the Market
Once you have a clear understanding of your costs, it’s important to research the market. Look at similar jewelry pieces to gauge their pricing. Consider the following:
- Competitor Prices: Analyze how similar items are priced in both online and local markets.
- Target Audience: Understand who your customers are and what they are willing to pay.
- Market Trends: Keep an eye on current trends that may affect pricing, such as seasonal demand or popular styles.
Setting Competitive Prices
After gathering all necessary information, you can set a competitive price. A common strategy is to use a keystone markup, which typically doubles the total cost of materials and labor. However, be flexible and adjust your prices based on demand and customer feedback.
Conclusion
In conclusion, pricing your jewelry requires a blend of analytical assessment and market awareness. By thoroughly evaluating your costs and understanding your target market, you can set prices that not only cover expenses but also reflect the value of your artistry.
Marketing Your Creations
In the competitive world of handmade jewelry, effective marketing strategies are essential for standing out and attracting potential buyers. Whether you are a seasoned artisan or a novice, leveraging the right tools and platforms can significantly enhance your visibility and sales.
- Utilize Social Media: Platforms like Instagram, Facebook, and Pinterest are invaluable for showcasing your jewelry. Create visually appealing posts that highlight your designs and engage with your audience through stories and live sessions.
- Build an Online Presence: Consider setting up a dedicated website or an online store on platforms like Etsy or Shopify. This allows you to present your creations professionally and reach a global audience.
- Content Marketing: Start a blog or vlog where you share your jewelry-making process, tips, and trends. This not only positions you as an expert but also helps in driving traffic to your online store.
- Email Marketing: Collect emails from interested customers and send regular newsletters featuring new collections, special offers, and behind-the-scenes content. This keeps your audience engaged and encourages repeat purchases.
- Collaborate with Influencers: Partnering with social media influencers can help you tap into their audience. Choose influencers whose style aligns with your brand for authentic promotion.
To maximize your reach, consider running targeted advertisements on social media platforms. This allows you to reach specific demographics that are more likely to be interested in your jewelry. Additionally, participating in local craft fairs and markets can provide face-to-face interaction with potential customers, creating a personal connection that online marketing often lacks.
In conclusion, by implementing a combination of these strategies, you can effectively market your jewelry creations, expand your audience, and ultimately increase your sales. Remember, consistency and authenticity are key in building a loyal customer base.
Conclusion: Embrace Your Creativity
In conclusion, creating DIY jewelry at home is not just a hobby; it is a rewarding and imaginative journey that allows individuals to express their personal style. With an array of materials and tools at your disposal, the possibilities are virtually endless. By investing time in learning various techniques and honing your skills, anyone can produce stunning pieces that truly reflect their personality.
Moreover, the process of making jewelry can be incredibly therapeutic. It encourages mindfulness and creativity, offering a break from the fast-paced world around us. Whether you are crafting a simple bracelet or an intricate necklace, each piece becomes a unique representation of your artistic vision.
To truly make the most of your DIY jewelry-making experience, consider the following tips:
- Experiment with Different Materials: Don’t hesitate to try out various beads, wires, and findings. Mixing materials can lead to unexpected and beautiful results.
- Learn from Others: Join local workshops or online communities. Sharing techniques and ideas with fellow jewelry makers can inspire new projects and improve your skills.
- Document Your Progress: Keep a journal of your designs and techniques. This will help you track your development and refine your style over time.
- Stay Organized: Create a dedicated workspace and organize your materials. A tidy environment fosters creativity and makes the crafting process more enjoyable.
Ultimately, the joy of making DIY jewelry lies in the freedom to create and the satisfaction of wearing or gifting something made by your own hands. So gather your supplies, unleash your creativity, and start crafting beautiful jewelry that tells your unique story.
Frequently Asked Questions
- What materials do I need to start making DIY jewelry?
To kick off your DIY jewelry journey, you’ll need some basic materials like beads, wires, and tools. Depending on your style, you might want to explore different types of beads, such as glass or wooden ones, and various wire gauges for strength and flexibility.
- Do I need special tools for jewelry making?
Yes, having the right tools can make a world of difference! Essential tools include round-nose pliers for loops, flat-nose pliers for bending, and wire cutters for trimming. Investing in these tools will enhance your crafting experience and help you achieve professional results.
- What are some beginner-friendly jewelry making techniques?
For beginners, stringing beads and wire wrapping are great starting points. Stringing is simple and can quickly lead to beautiful necklaces or bracelets, while wire wrapping adds a polished touch to your designs. Both techniques are fun and easy to master!
- How can I design unique jewelry pieces?
Developing your unique style starts with understanding color theory and creating a mood board. A mood board can help you visualize your ideas and inspire your designs, enabling you to create pieces that truly reflect your personality.
- What are the best ways to sell my DIY jewelry?
To successfully sell your creations, focus on setting competitive prices and utilizing effective marketing strategies. Social media platforms can be powerful tools to showcase your work and reach a broader audience. Don’t be afraid to share your story and connect with potential buyers!